
How to create a web server linux,Php,Mysql RDS with Amazon Architecture AWS PART 3
In this tutorial you can transform your web server created to a powered server with PHP and Mysql Database.
Please read and follow the next instructions to get a LAMP web server configuration:
STEP 1
Enter to the linux console with WinSCP and Putty and write the next instruction one by one:
sudo apt install php libapache2-mod-php php-mysql (install PHP on your web server)
sudo nano /etc/apache2/mods-enabled/dir.conf (use nano for edit the dir.conf file, change "index.php" at the first position. You can use other editor, please be carefull editing this files, always make a backup file as possible).
Now change the file "dir.conf" order DirectoryIndex to this: index.php index.html index.cgi index.pl index.xhtml index.htm
DirectoryIndex index.php index.html index.cgi index.pl index.xhtml index.htm
Save and exit!
sudo systemctl restart apache2
Now you can install all the libraries that you need, for example php-cli library:
sudo apt install php-cli
Then restart Apache server:
sudo systemctl restart apache2
You need to change permissions to the public directory to create new files or edit in your new application.
sudo chown -R ubuntu /var/www/html
Now please go to the /var/www/html and test if you can read PHP code creating a index.php file for example. Right click and select "New >file..." on the right side (/var/www/html) on Winscp
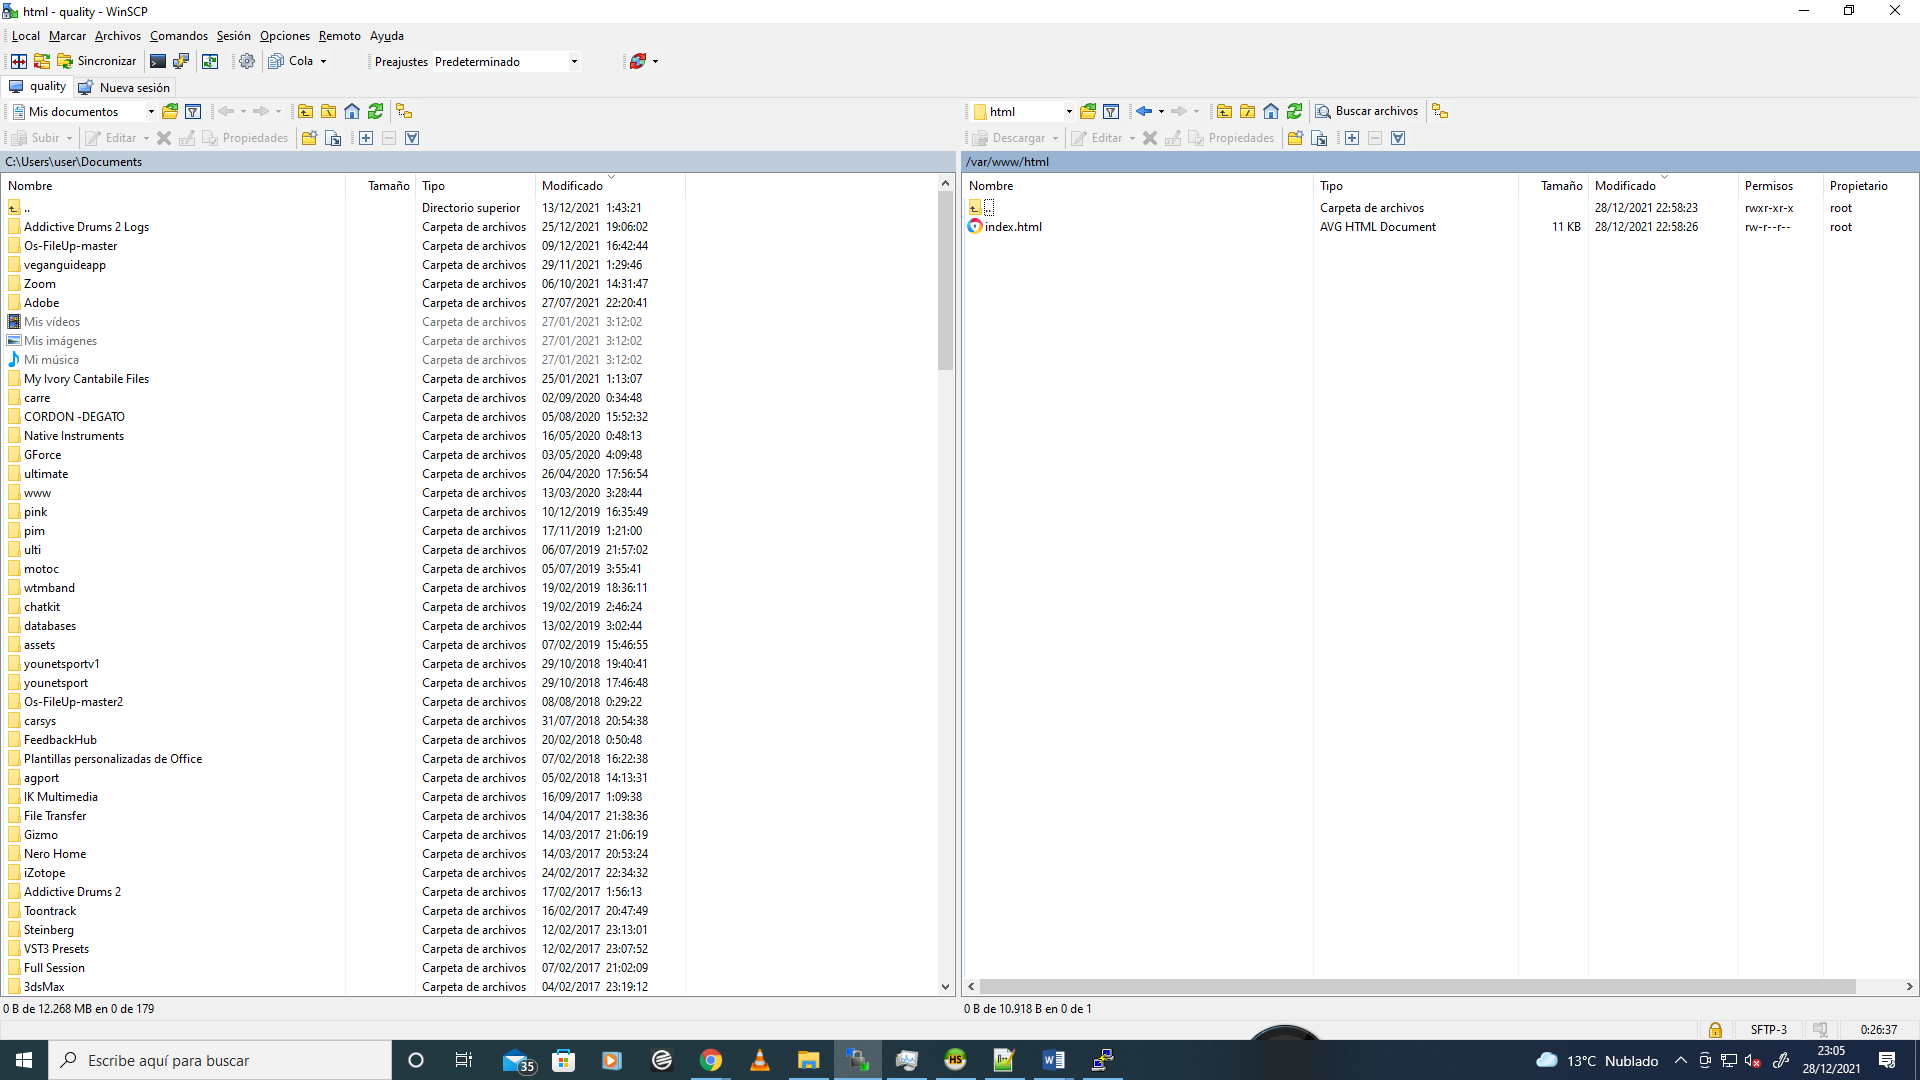
Then write the next line to test if PHP it´s allready installed using your favorite code editor:

Save the file and go to your web navigator and write some like this: http://yourpublicip/index.php where yourpublicip it´s the elastic ip created for the instance in AWS.
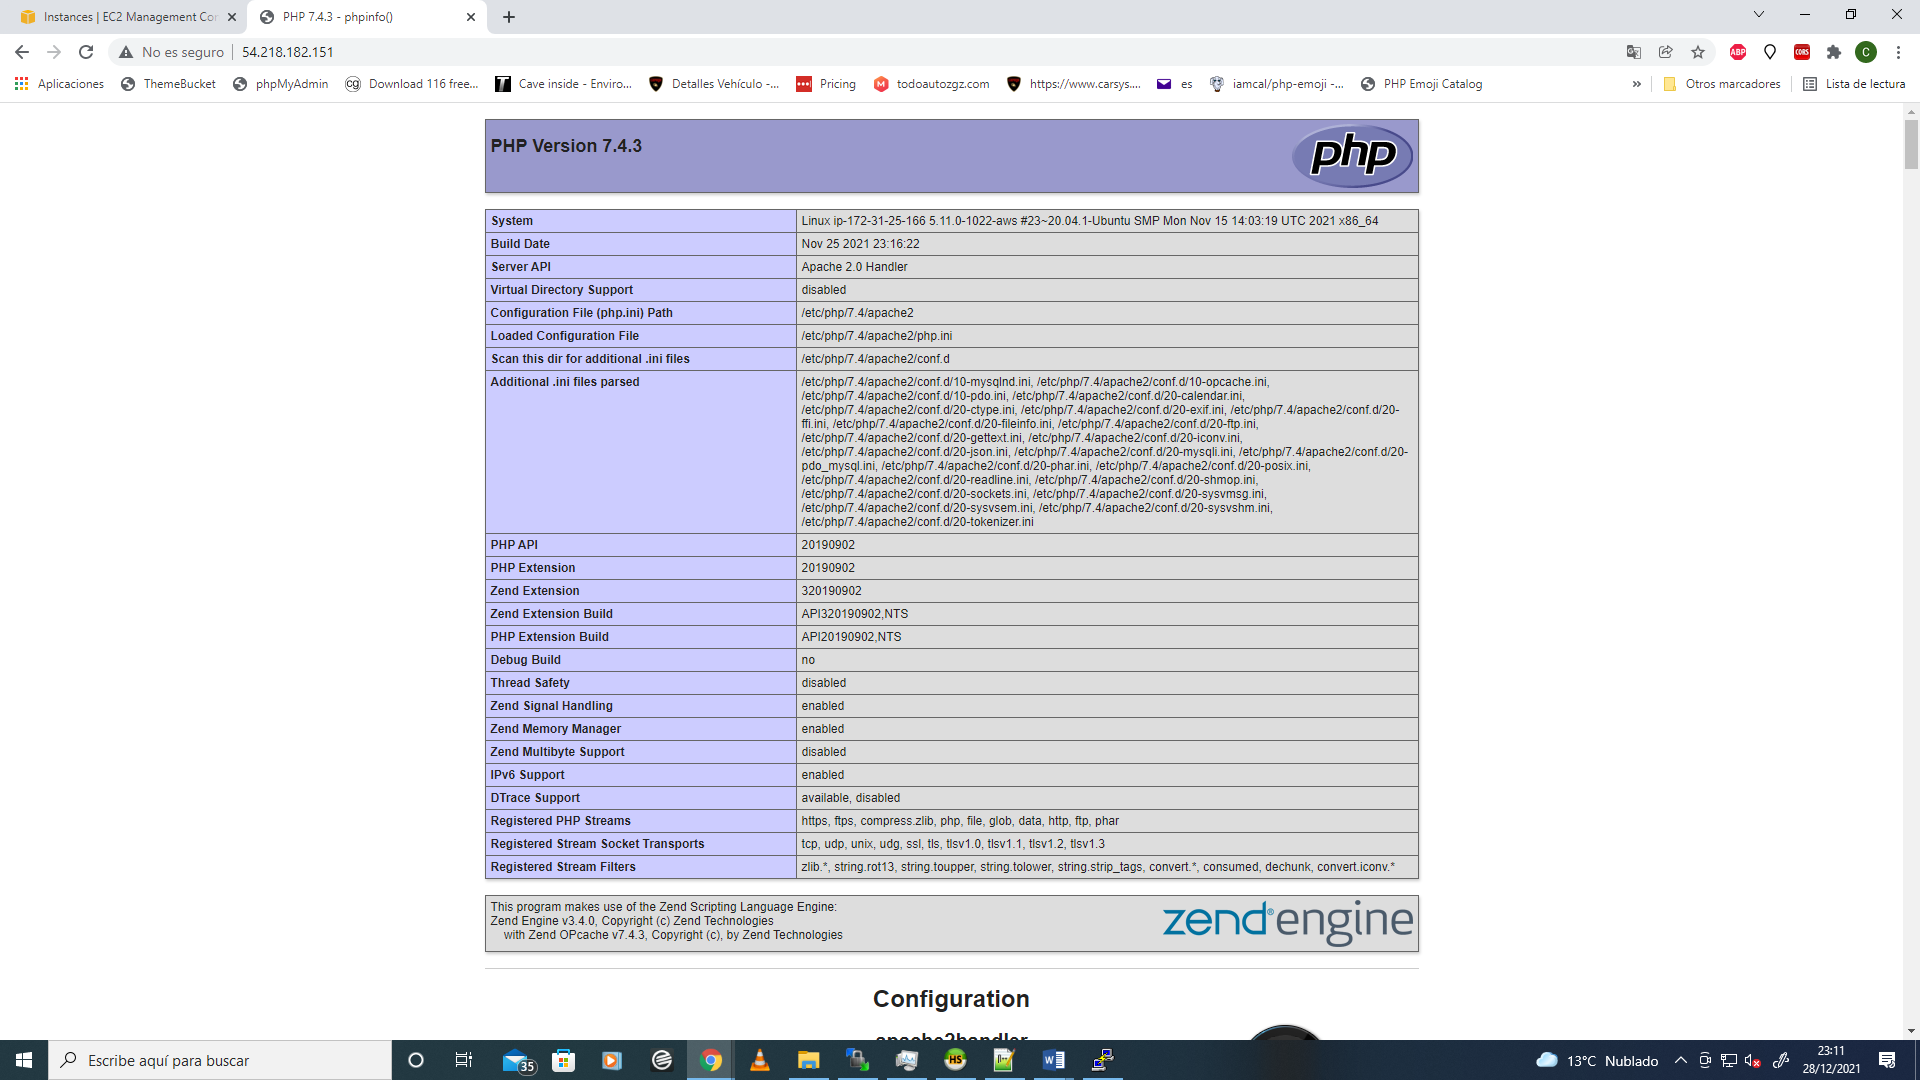
Now you can review all configurations created for your PHP installation.
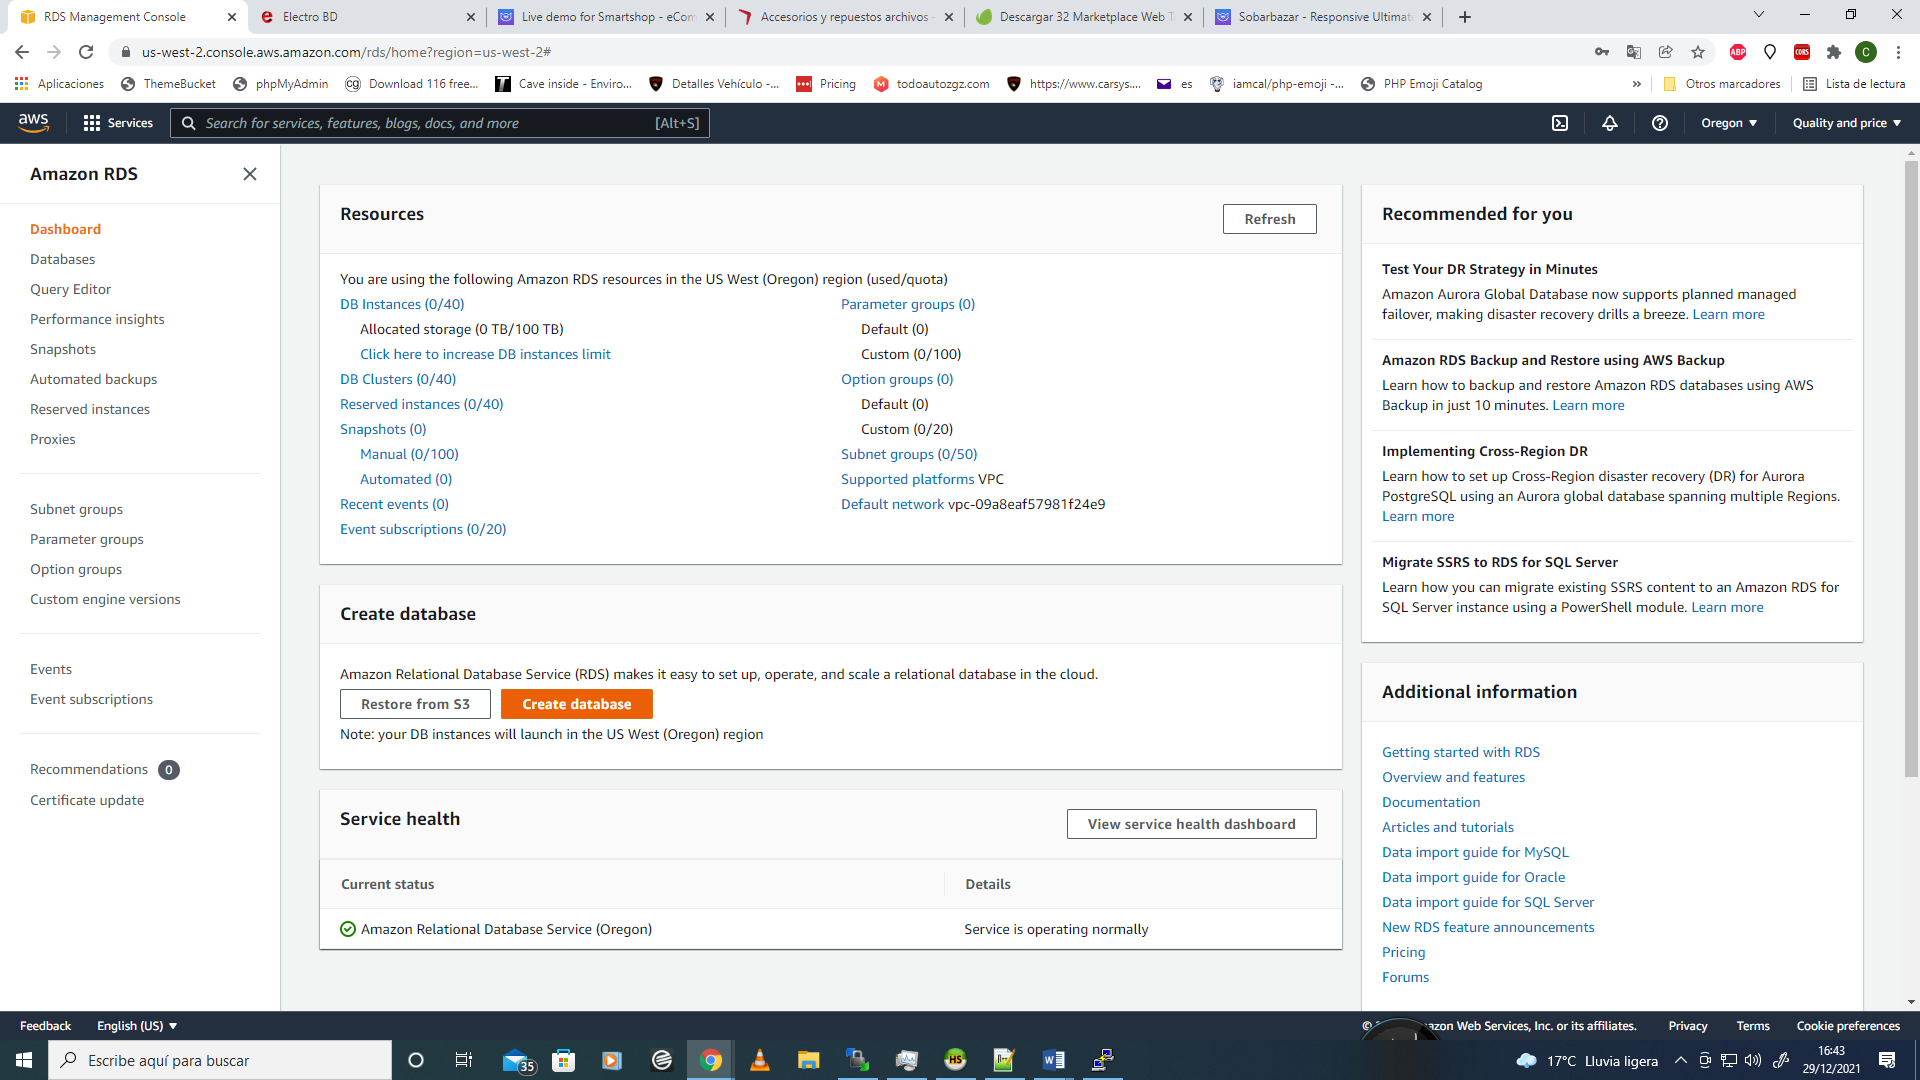
Ok, it´s time to create the Mysql Database, you can install mysql databases installing mysql on your server but in this case we show to you the service called "RDS" on Amazon Web Services.
RDS it´s a powerfull mysql database as a new instance separated from your instance server, so you can optimizate the performance with two instances separatelly.
RDS MYSQL AWS INSTALLATION
Please read and follow the next instructions to create and configurate your first RDS Mysql service.
Configure and Install RDS
First go to "Create database" section and click on orange button "Create database".
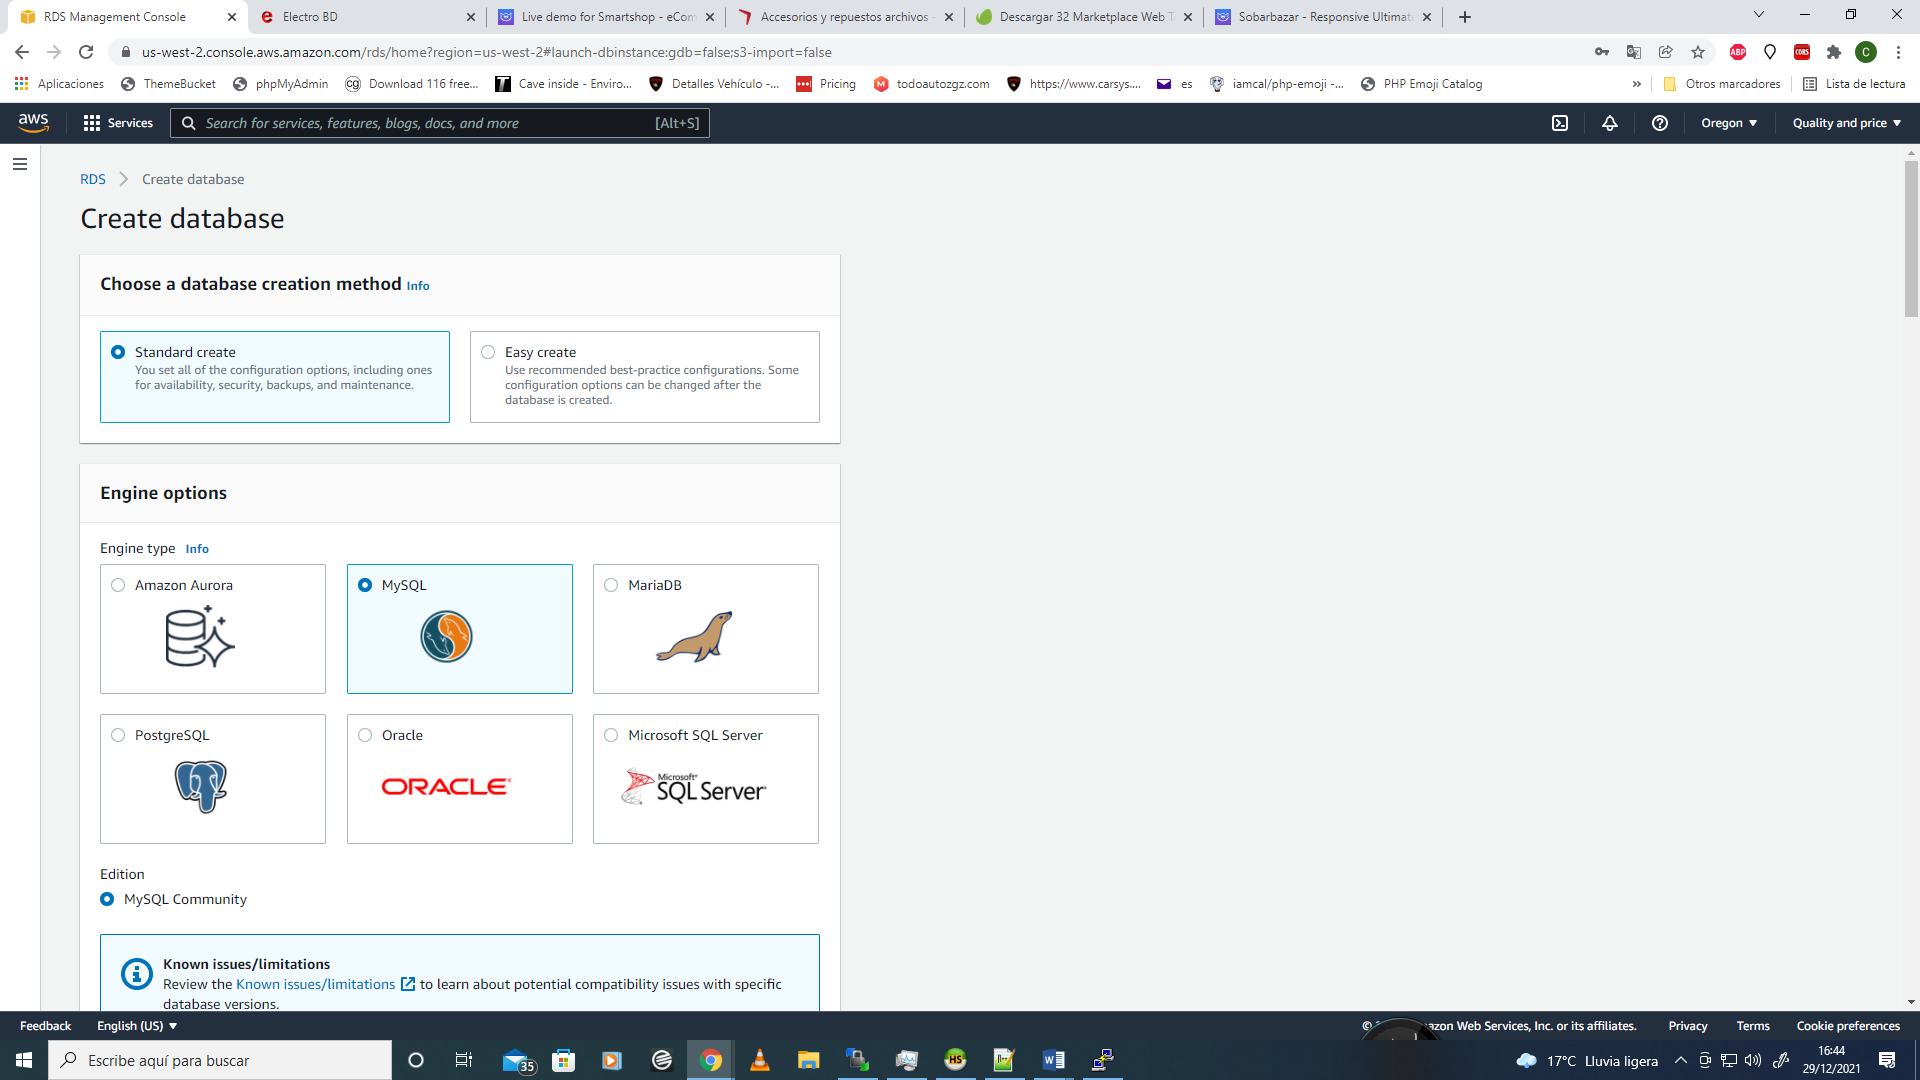
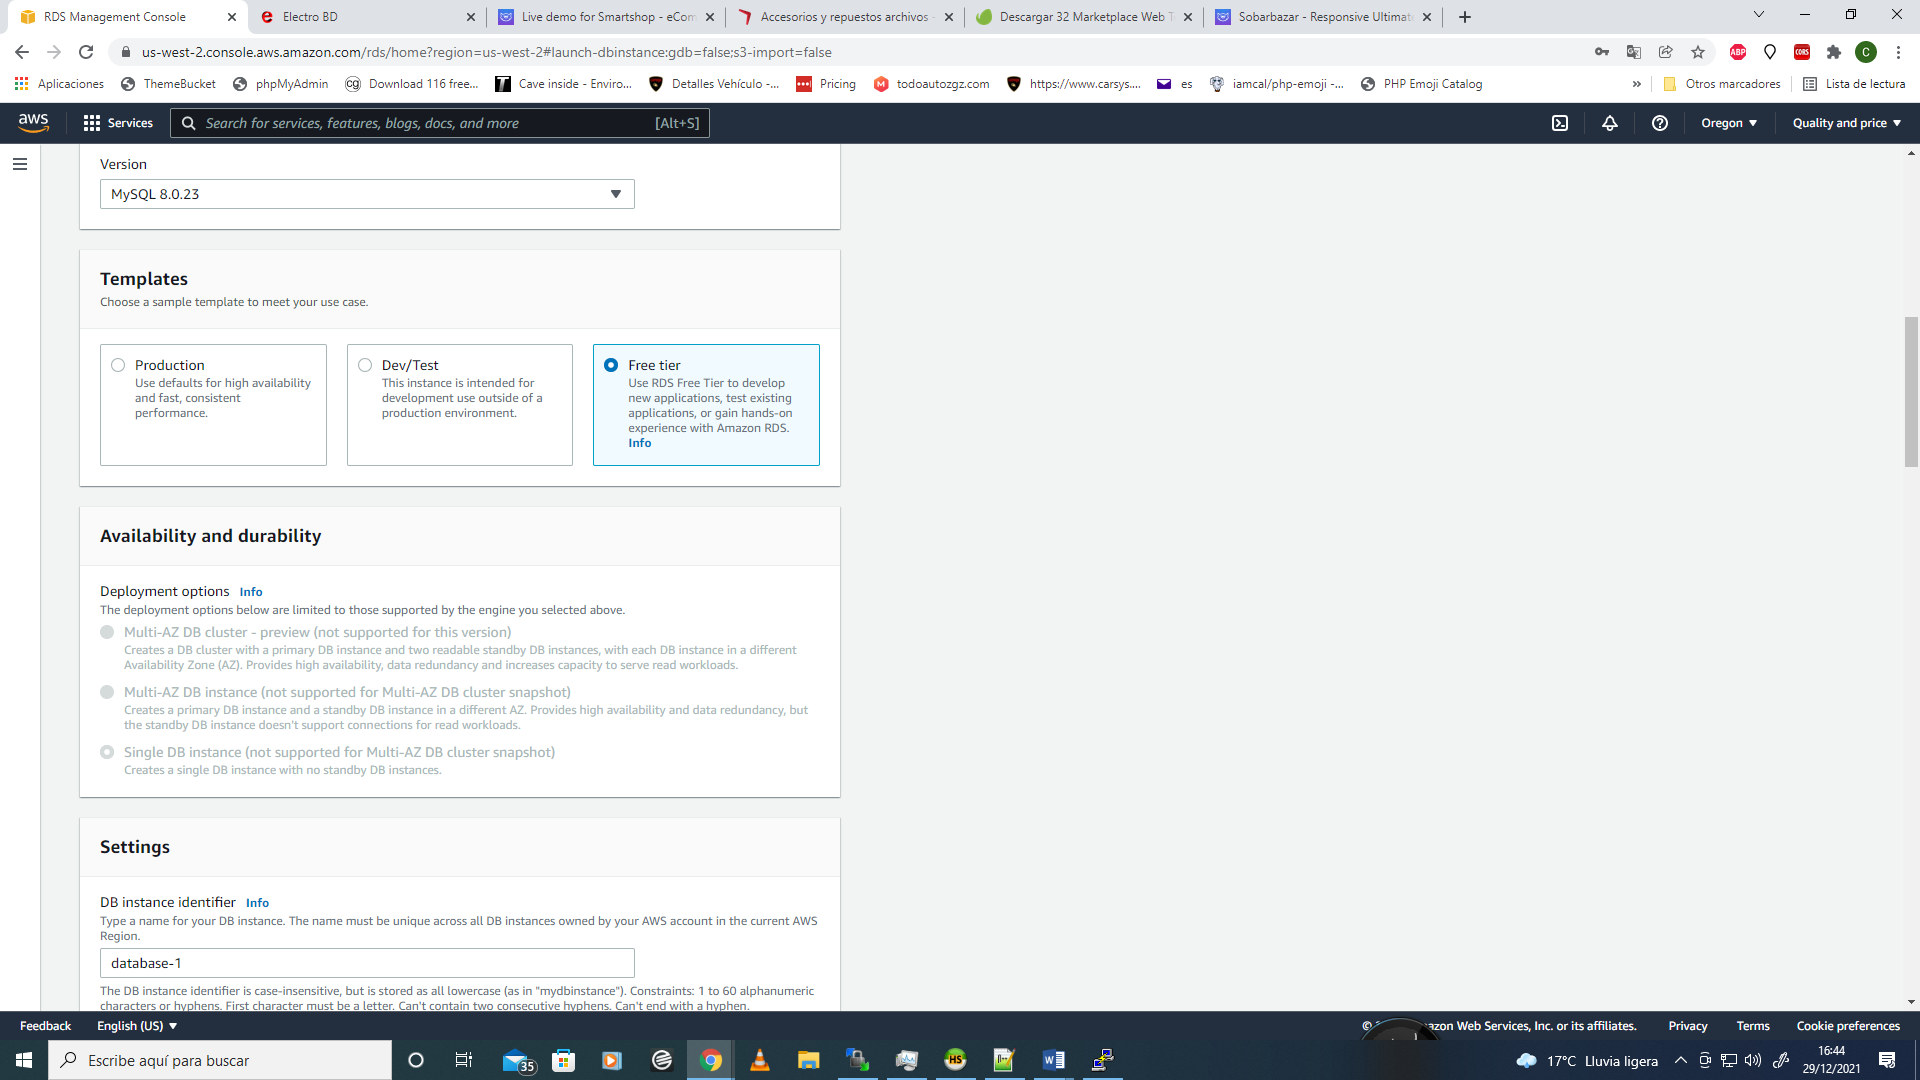
Please select Standard Create option to learn how to create and cofigure a new database.
Then select Mysql as Engine option, Mysql Version and "Free tier" Template
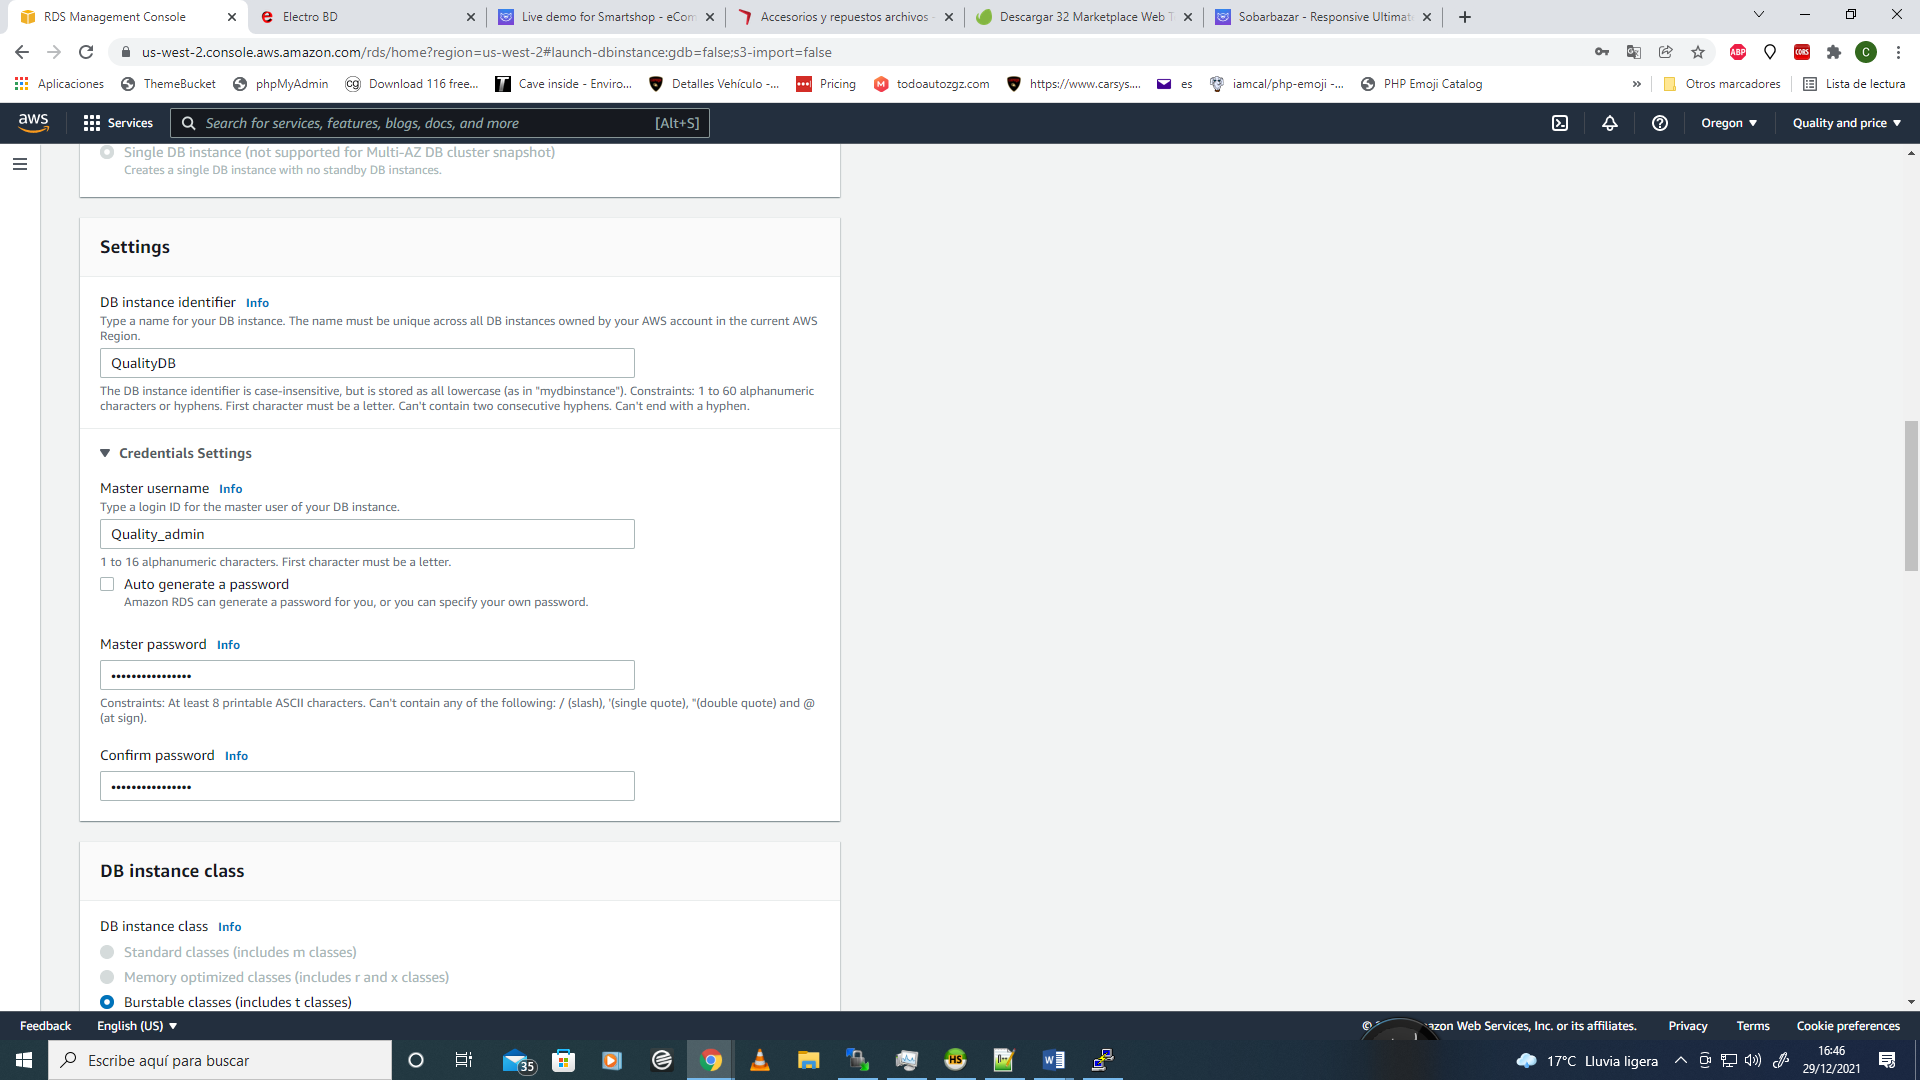
Change for your own identifier name, Master username and Master Password
Select the same options below, select the virtual private cloud showed on your own selector.
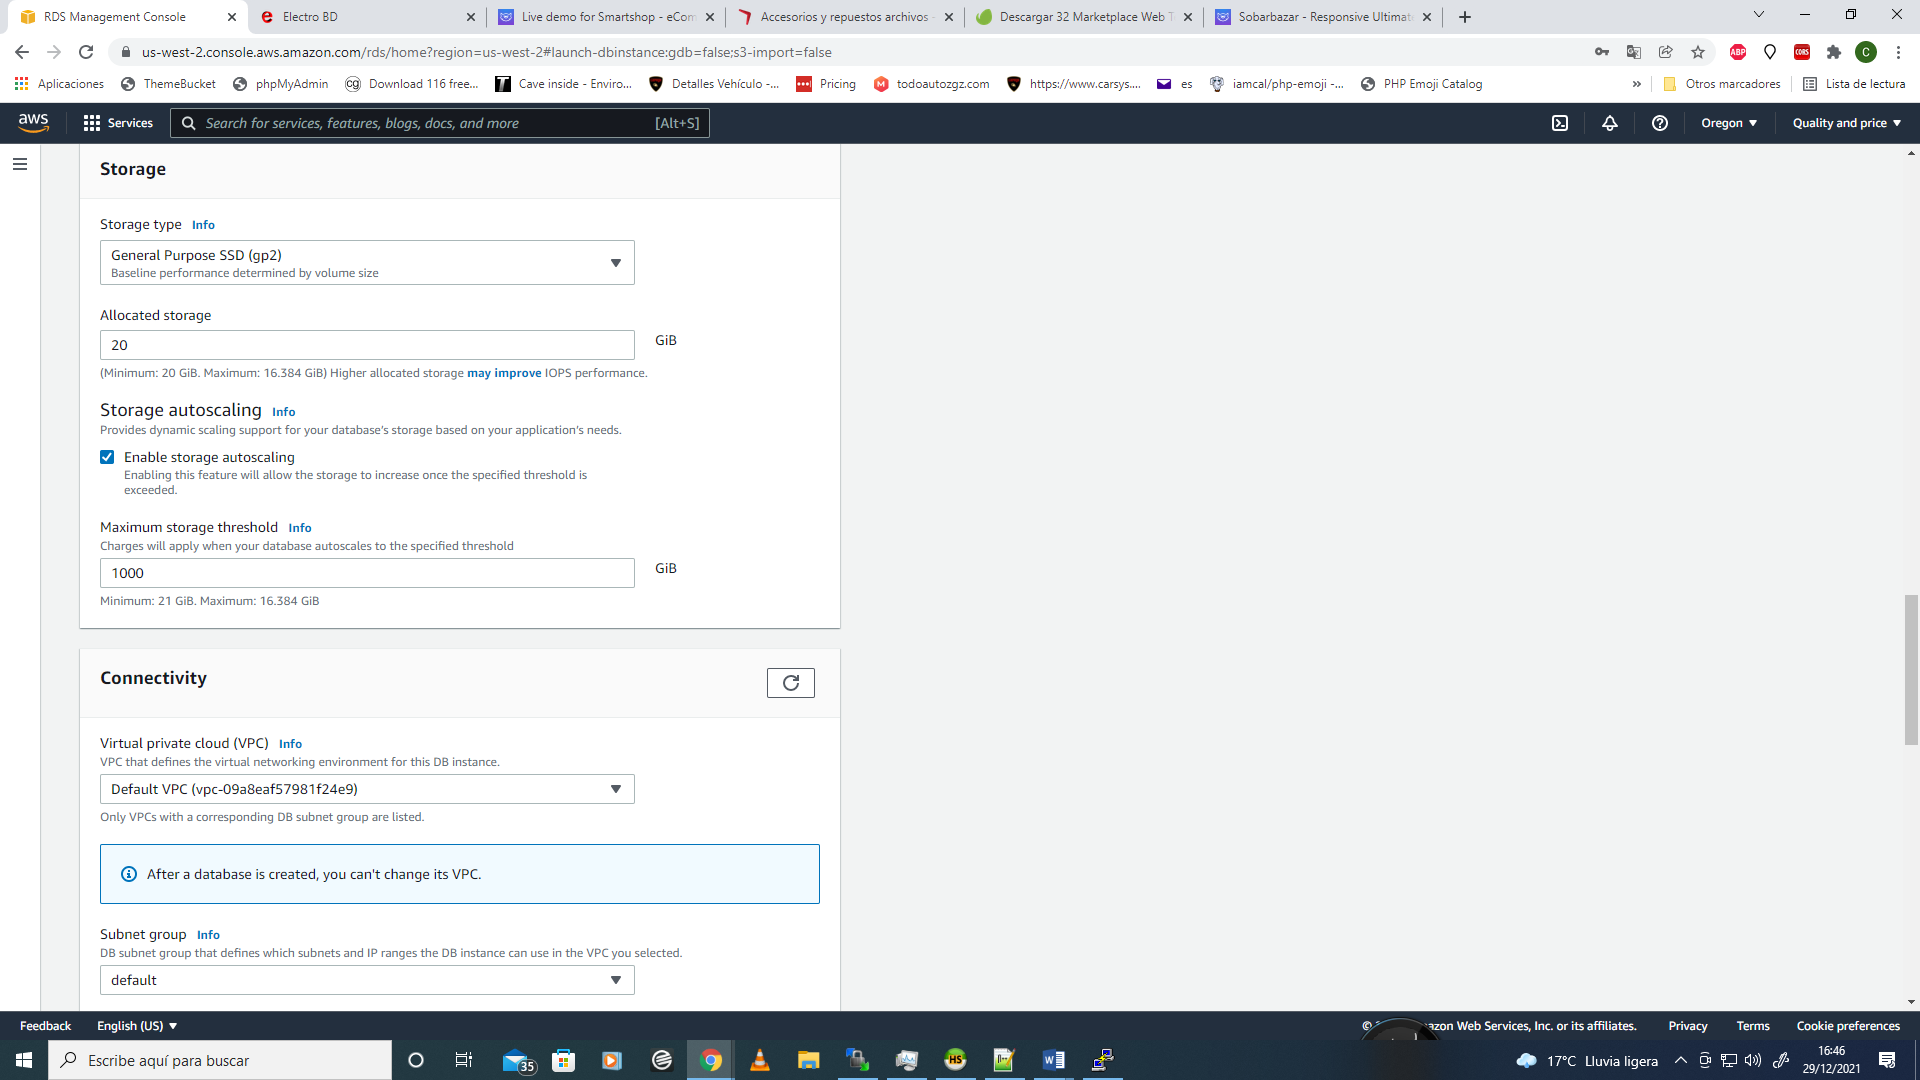
Subnet group: default
Public Access: yes
Select the Security Group created before on the instance configuration.
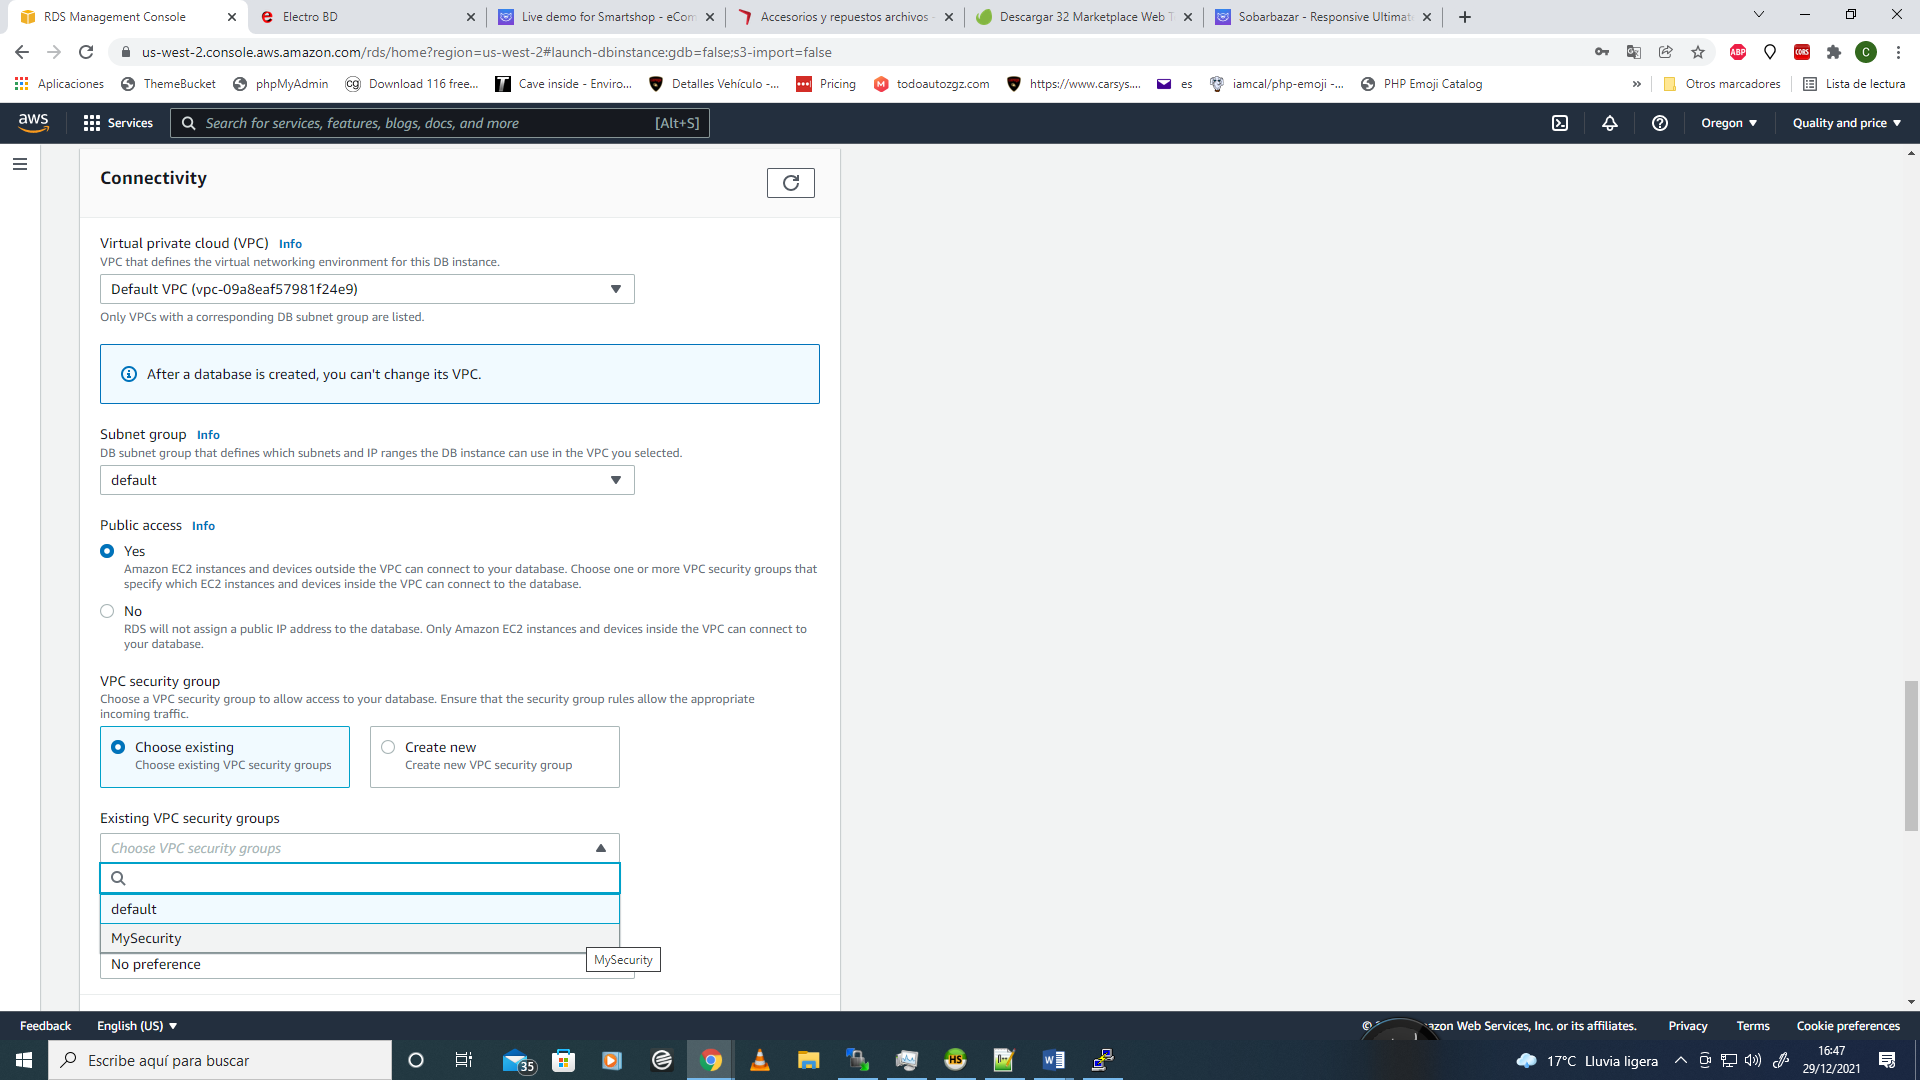
Select Password authentication option
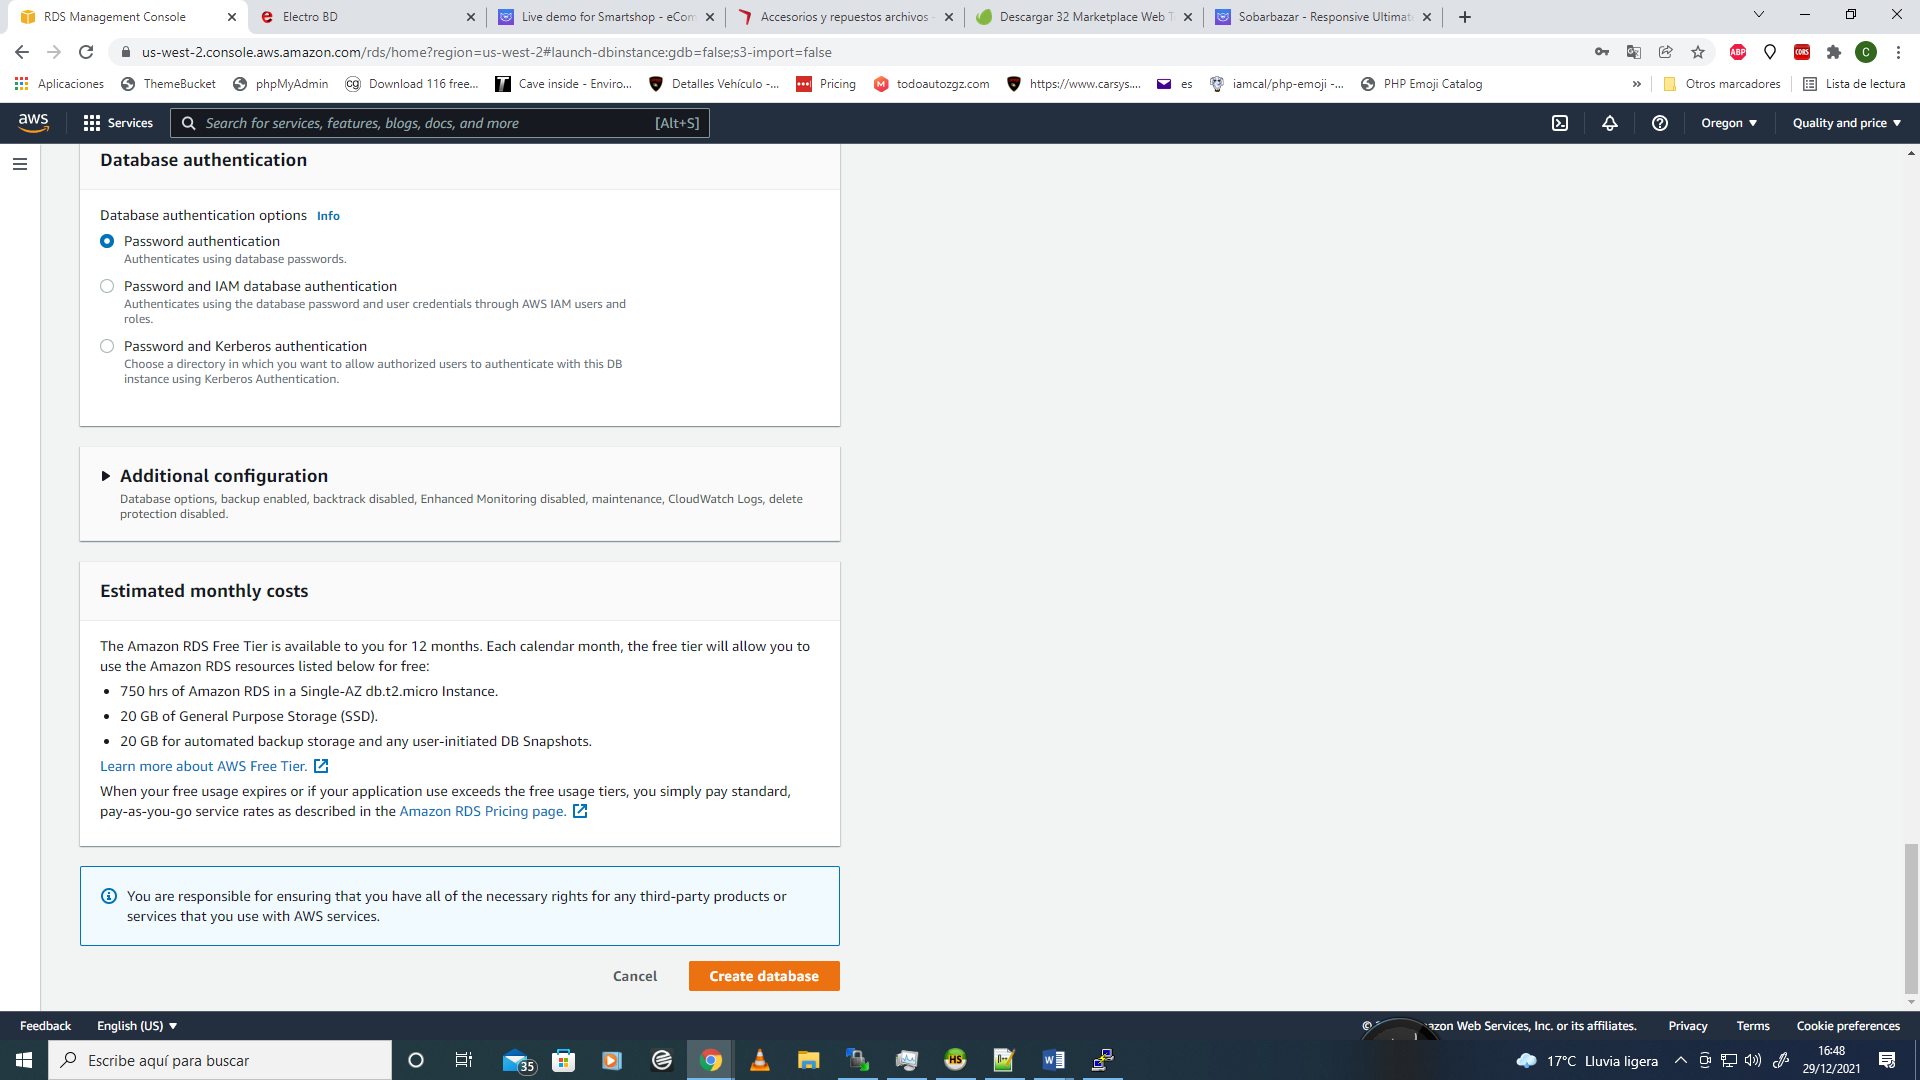
And click on CREATE DATABASE button!
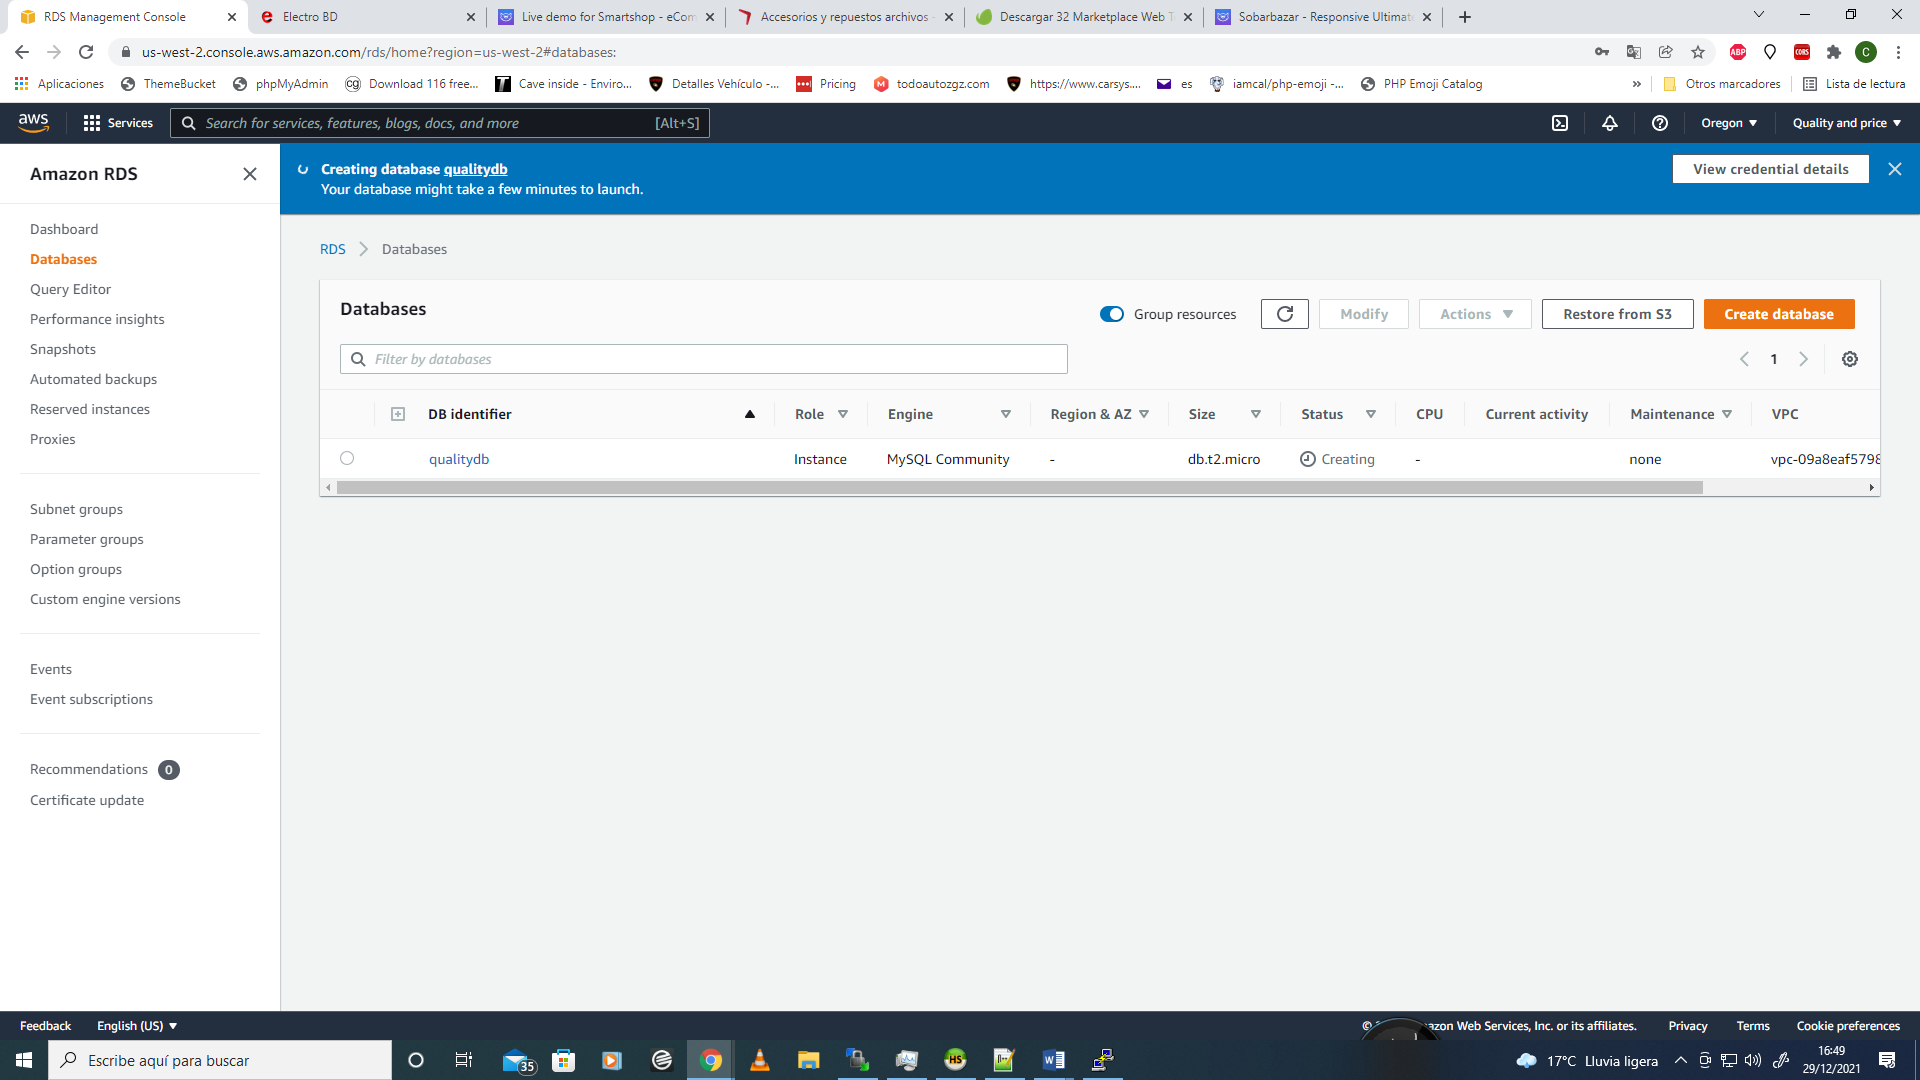
Your new database was created, please wait some minutes to get access to your database.
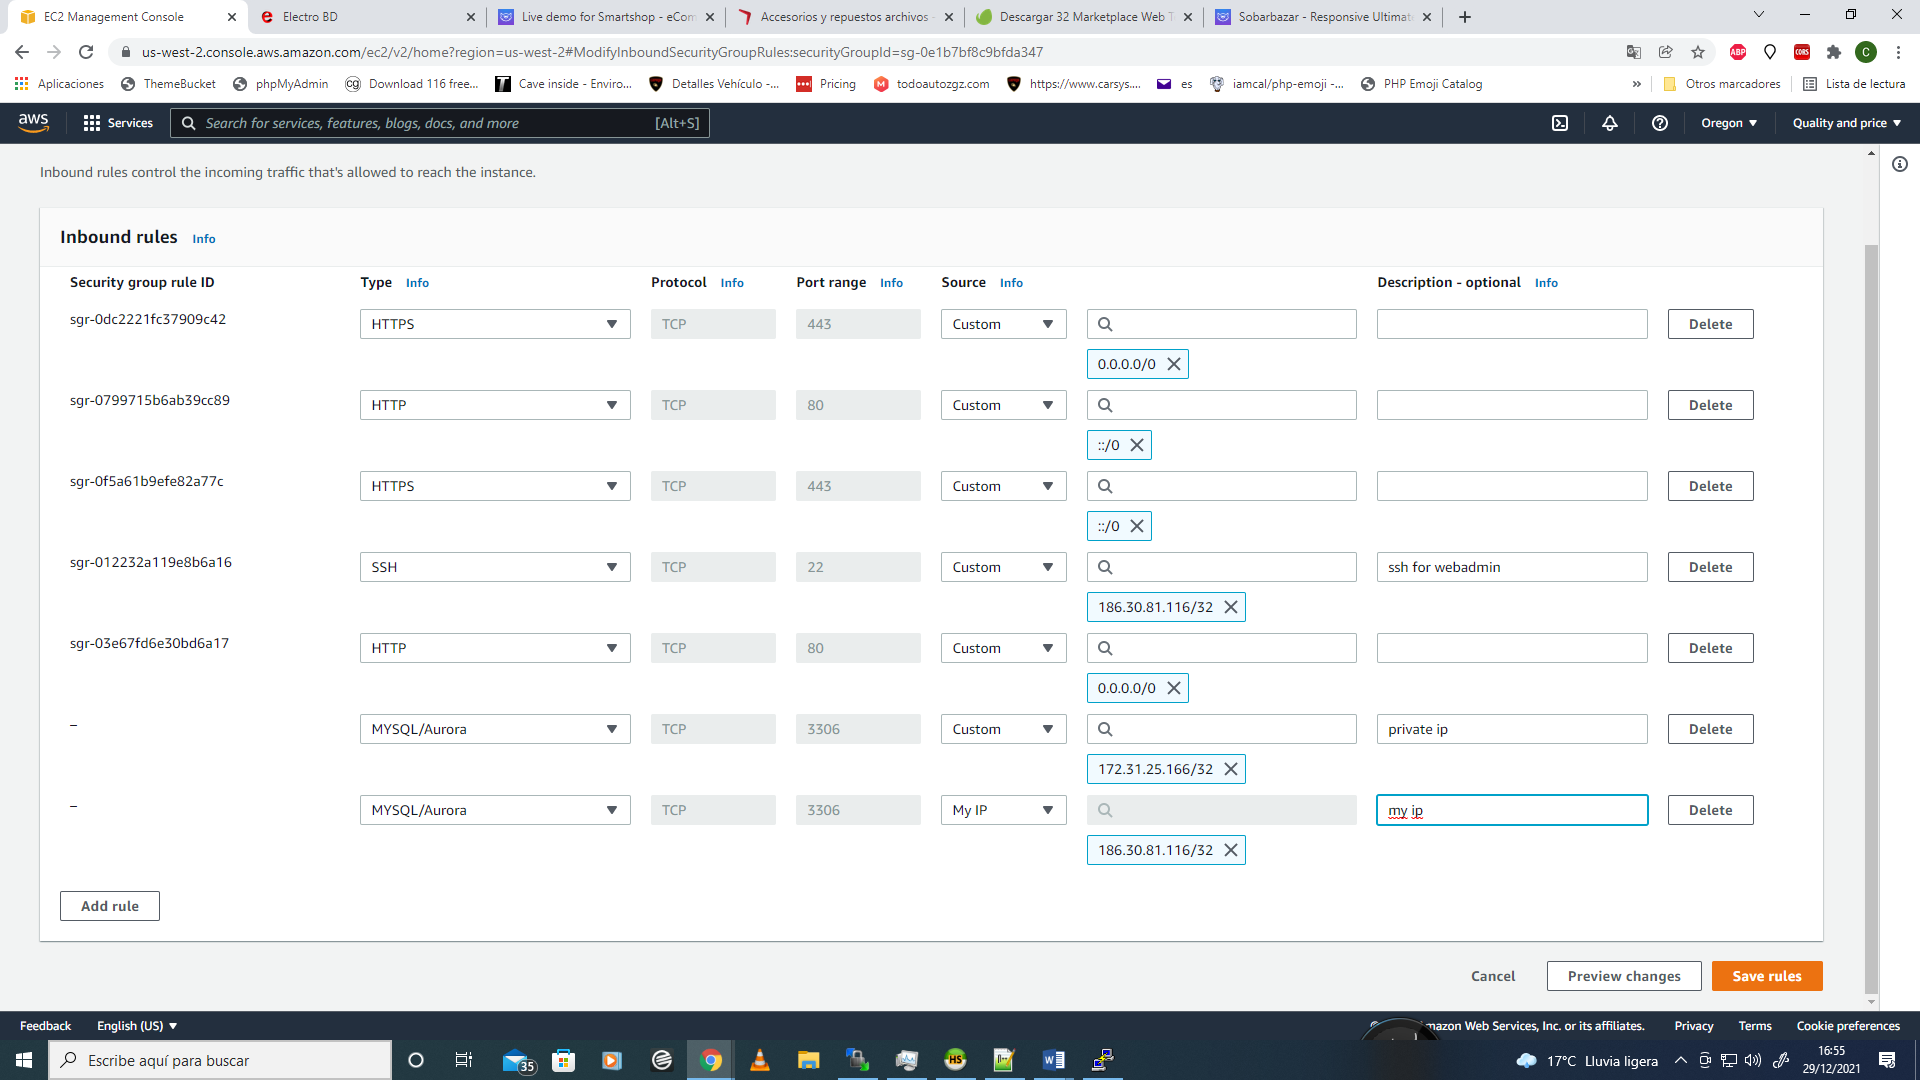
Now it´s so important that you access to the Security Group created and add the Mysql/Aurora ports. Please create one port and assign to your local ip and other port to assign to the "Private IP" of your instance to connect your web server and your new database. You can find your private ip clicking on your new ec2 instance and search private ip on AWS panel.
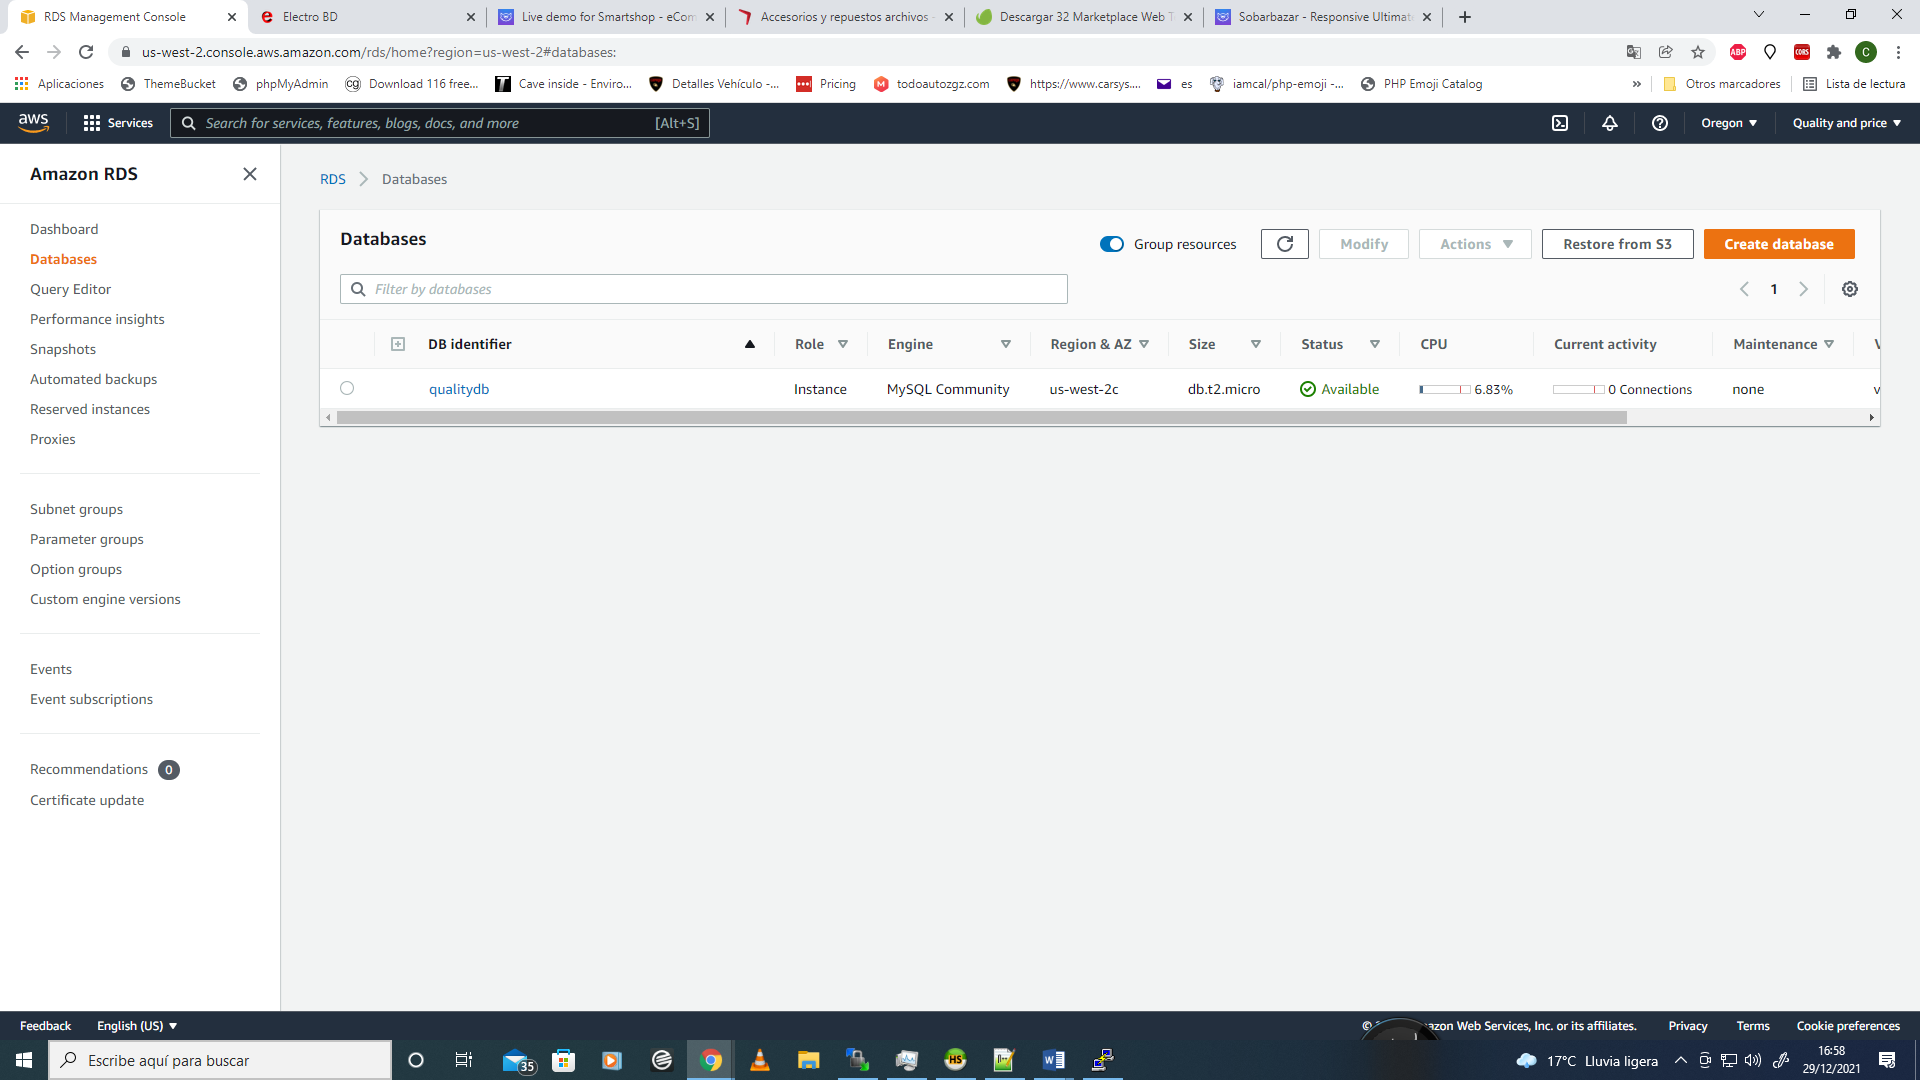
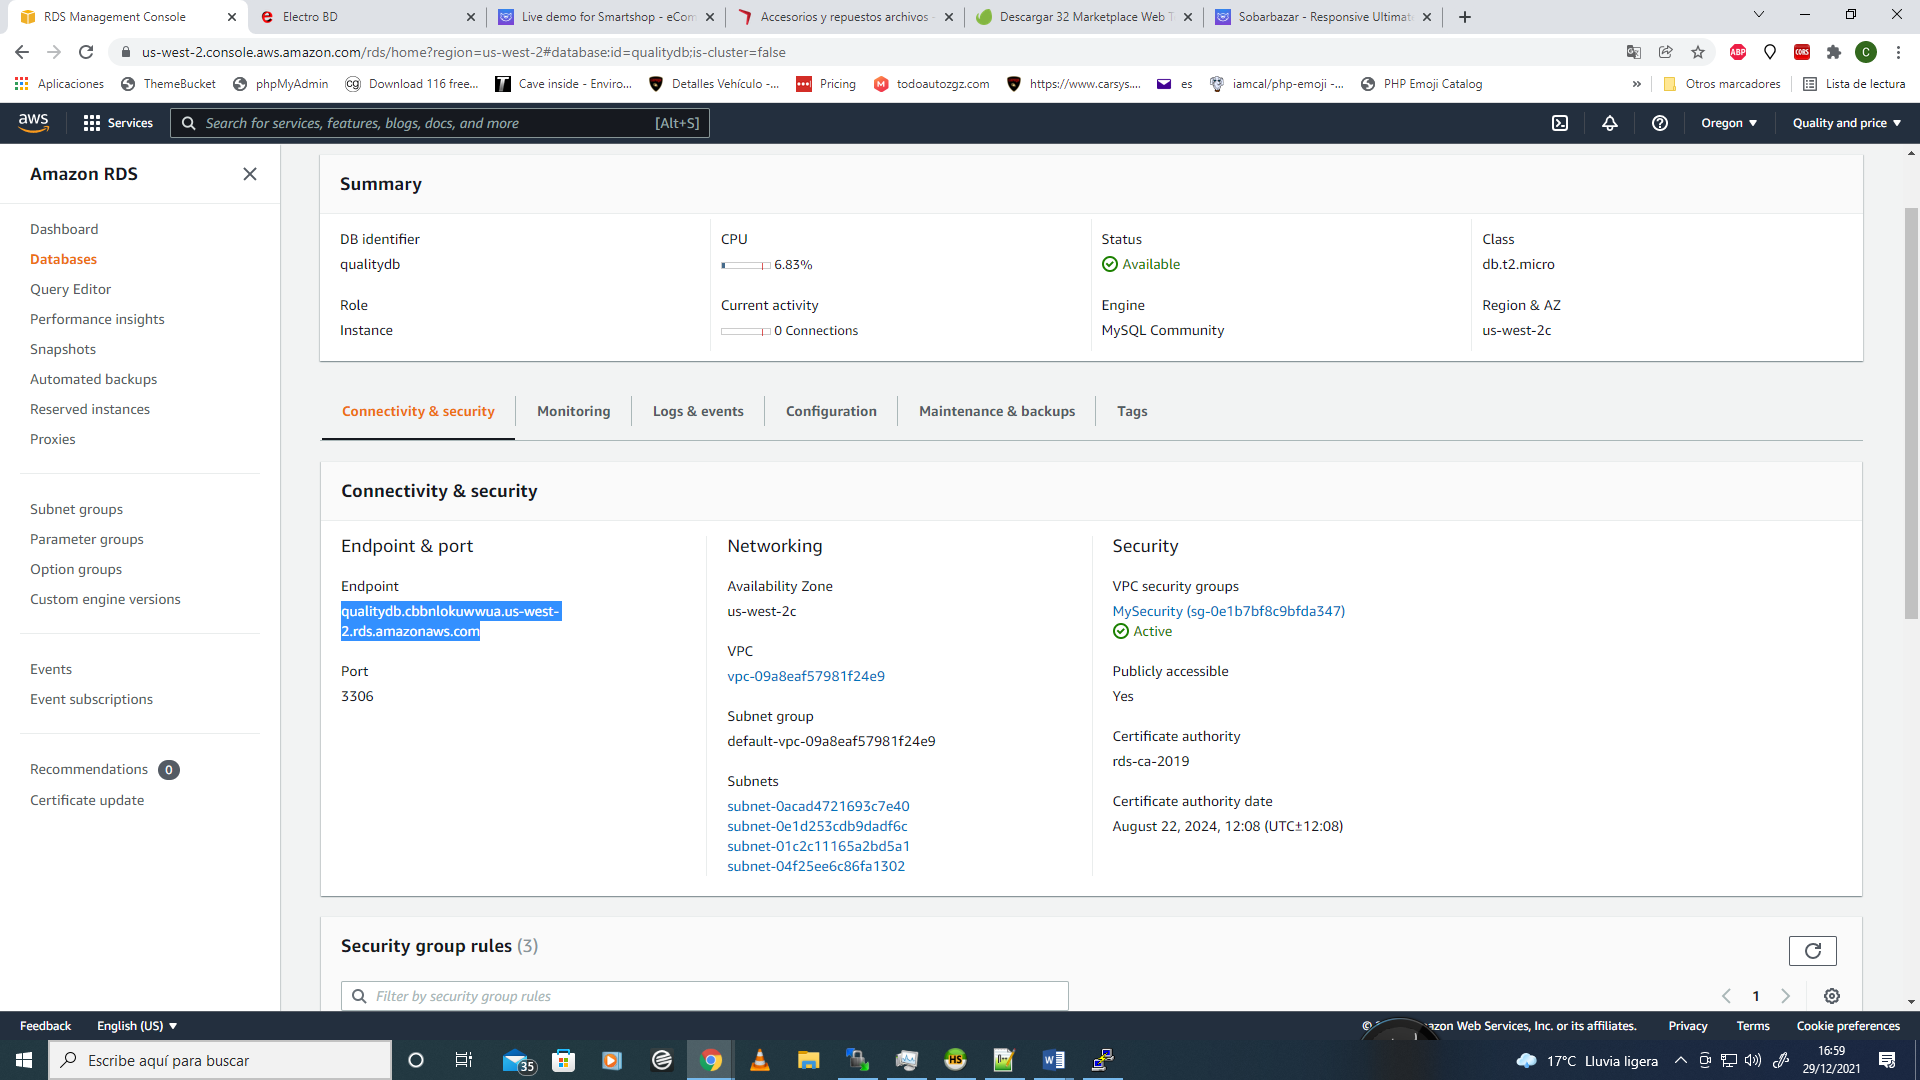
Then you can review your database on RDS again and verify if the "status" it´s "Available".
To get connected to your new database from the web server via PHP or another Database interface like HEIDI SQL
Copy your endpoint as a host database server and make a new connection with your username and password too.
HEIDI SQL
On this tutorial we used HeidiSql as a Database interface and create databases step by step as follow:
STEP1
Please create "new" connection and enter all the information about your RDS database
Host, Username and Password previously created on AWS RDS service.
3306 port and click with "Open" button.
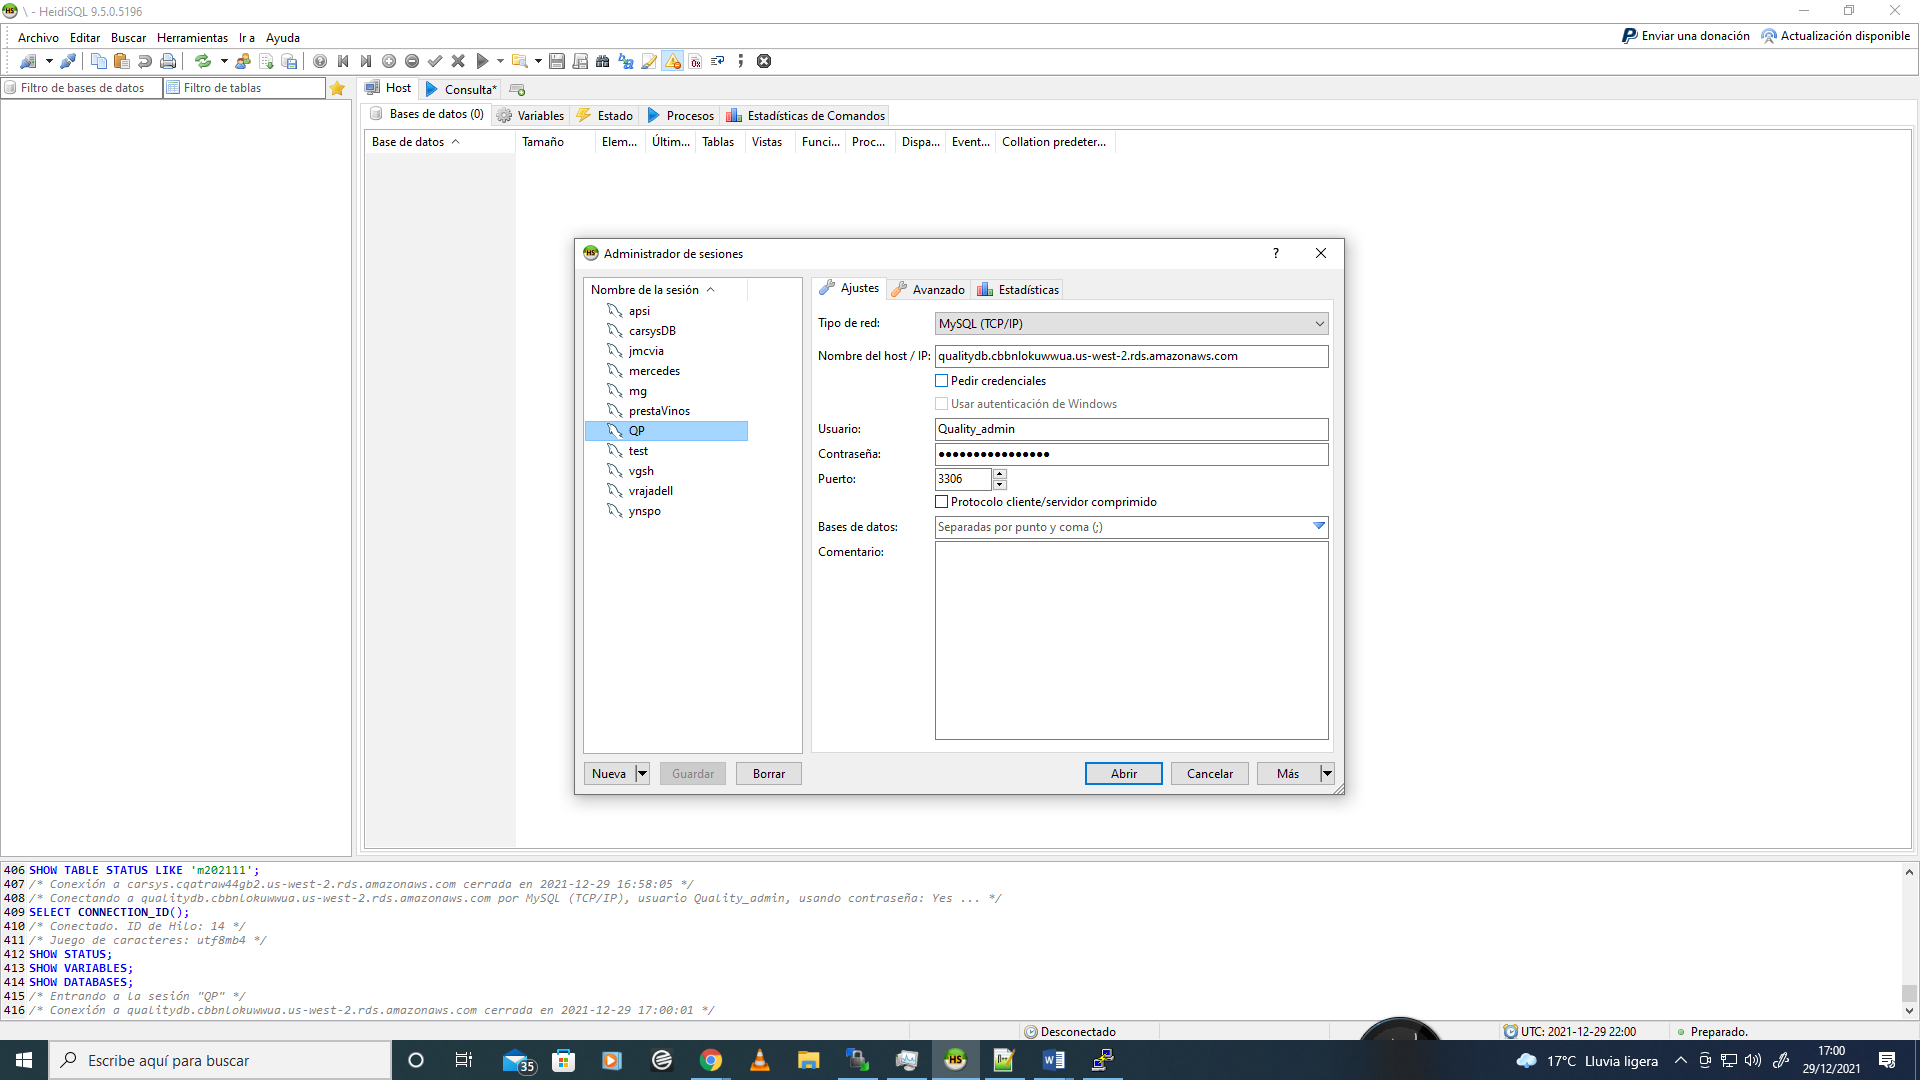
If your connection it´s OK you will see the next window:
First you need to create a new database so, 1. right click 2. Create New 3.Database and you have a new database, follow the instructions of HeidiSql and begin to create your own tables or be free to import a Sql file.

Thanks for read!!!


